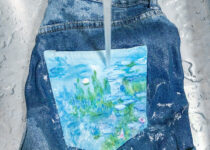
Can you paint over polyurethane
A stunning piece of furniture in your garage has been there for some time. It has been there for some time. Even if your new, solid furniture looks fantastic in your house, you may want to consider updating it. Applying a fresh coat of paint is often all required, but can polyurethane be painted over?
At first glance, this looks like a question with a clear-cut and uncomplicated response. The correct answer is that you must prepare the artwork before painting over polyurethane with regular paint. This is the prerequisite step.
Here is all you need to know about painting over polyurethane if you’ve been itching to give some old furniture a new lease.
How Does Painting Over Polyurethane Affect It?
If you paint over polyurethane without first preparing the surface, you will probably end up with paint that peels off very immediately. The removal of the paint from the character won’t need a lot of effort at all. When the paint’s surface is scratched with a fingernail, most people discover that the paint comes off easily.
Painting directly over polyurethane presents several challenges, one of which is the potential for the wood’s resins to change the project’s overall colour. They could seem orange or yellow if they pierce through the finish and the final coat of paint on the object’s surface. To prevent an issue of this kind, ensure that you use the appropriate priming and paint.
How should the artwork be prepared so it may get a fresh coat of paint? The following is a list of the actions you need to complete the assignment correctly.
Sanding
Most people who want to learn how to paint over polyurethane hope to find a hidden trick to save them from having to sand. A little elbow grease can get you sweaty and messy. Unfortunately, you must spend some time sanding furniture with a polyurethane finish before painting it.
Even if you merely wish to stain the wood rather than paint it, you must remove the thick, yellow polyurethane covering.
Keep in mind that it may need many passes using different grits. Start using heavy-grit sandpaper to rough up the surface and remove as much of the polyurethane as possible. Use progressively finer grits to get a homogeneous, smooth surface free of any noticeable scratches that the heavy grit paper could have caused.
You should have a clean, unfinished piece of wood at the end.
Using a palm sander can make this simple process less time-consuming. It won’t fit into tight spaces or areas with odd shapes, like spindles or table legs. In these situations, conventional handheld sandpaper will still be your best ally.
Making use of a Deglosser Coat
Is it possible to paint over polyurethane without first sanding it? Many argue that sanding is the only natural choice when contemplating painting over polyurethane. They are not aware that there could be an alternative. Deglosser, often known as liquid sandpaper, may perform functions comparable to sandpaper but without sweat.
It erodes the varnish while producing a new texture for the paint to adhere to. It is an excellent substitute for furniture pieces with too many intricate elements to hand sand.
Before utilizing this drug, you should know how potent it is. You will need safety eyewear and skin protection to apply this to your project effectively. Always operate in an area with enough ventilation to prevent lung damage or headaches from the fumes.
As with any other kind of chemical, test a substance on a small, inconspicuous area before applying it to the whole piece of furniture. Indicators that the chemical is harming the wood underneath it should be sought.
How exactly should deglosser be used? There is a simple fix. Dip a lint-free cloth into the mixture and then wipe the mixture over the surface of the wood. The process of massaging it in or rinsing it out is not laborious. Once it has dried naturally, you ought to be able to paint over it.
At all times, use a primer.
Prior to painting over the polyurethane, a light coat of bonding primer will be required. You may lessen the possibility that tannins will bleed through your paint and alter the color of the surface by using a high-quality primer. To avoid leaving any portions of the project with significant paint splotches, primer should be applied in even, thick strokes.
Sand it gently when the first coat has dried. Wipe away any sawdust entirely before beginning to apply a second layer of primer. The following day, resend the piece of furniture after allowing it to dry overnight. The goal is not to sand through the primer. Remove any remaining brushstrokes on the artwork, regardless of their kind.
If the primer is not sanded correctly, the object may have blotchy stains when the final coat of paint is applied. The primer may cause these stains.
Primers are notorious for being cumbersome and hard to remove. Produce sure you have enough mineral spirits on hand so that you can clean your brushes and any other messes you may make. find out primer drying time here for better coating and long lasting shine.
Using Paint
After completing all these steps, you are prepared to paint your project. Several options are available to you regarding the paint you decide to use. Some people choose to use an all-in-one solution because they believe it will save them from having to apply both primer and paint. Sadly, there’s a chance that this isn’t the best option for your project.
These one-step cures are often quite expensive, and you won’t get a permanent outcome from them. Unintentionally scraping any of this paint off the surface might expose the wood. It’s also possible that the wood’s resins might contaminate the paint’s final coat and affect the finish.
Make sure the project’s surface is free of any dust left over from the sanding you did in the previous stage. To clean it, use a lint-free cloth. The initial paint layer may then be used. After allowing the first application to dry overnight, apply a second coat in the morning.
Your paint is now technically dry, but it still needs to cure. Before embellishing it or placing items on top of it, give it at least 72 hours. It would be ideal if you could wait a little bit longer than this.

Use of Chalk Paint
Chalk paint is advertised as a miracle paint that can cover any surface without any surface preparation. The matte finish of this paint gives it a rustic appearance that may be easily accentuated to seem shabby chic. It may be applied to almost any clean, dry surface with few restrictions.
Even if the object has previously been painted, cleaning the surface is all that is needed to prepare it for chalk paint application.
Your polyurethane furniture should theoretically be able to have chalk paint applied on top of it. Painting over polyurethane furniture shouldn’t be an issue with this chalk paint, but if the polyurethane is polished, you may want to consider sanding beforehand.
The chalk paint may still peel off if the sheen isn’t mostly taken off with sandpaper. Consider heading in the other direction.
Can polyurethane be used to cover chalk paint?
The answer is unquestionable yes. There are several situations when polyurethane may be preferred over the standard wax finish. Because polyurethane is more durable than any other two options, it is typically selected as the finish. If your furniture will be subjected to a lot of moisture or wear and tear, polyurethane is the finish type that is safest to use.
Many individuals use wax to finish their chalk-painted work because it adds another layer of depth. Wax comes in a range of colours to enhance the overall appearance of the paint. Polyurethane will only preserve that gorgeous colour rather than offering the shabby chic appearance and distressing as wax would.
How to Properly Finish Your Furniture
It is possible that painting over polyurethane will be a significant inconvenience, and this remark is accurate. Several measures need to be taken to guarantee that it will come out appropriately and will not peel off the surface of the object immediately.
If you take the time to execute the job properly, the thing you’re working on will endure for years without needing any maintenance or repairs at regular intervals. You should be well on your way to painting your first piece of furniture if you keep some helpful ideas in mind.

FAQ
-
What kinds of paint are compatible with polyurethane?
Acrylic latex paint is suited for lightly stressed, prepared outdoor polyurethane-treated surfaces.
-
Can you paint directly over polyurethane?
You may paint over varnish or polyurethane if you properly prepare the surface. Paint may flake off if polyurethane isn’t applied first since it won’t instantly attach to it.
-
Should I prime the polyurethane before painting it?
The optimum strategy often involves priming polyurethane before painting. Even after sanding, the leftover polyurethane may make it difficult for the paint to adhere. This is particularly true if you want to use latex paint to cover an oil-based polyurethane.

Being associated with art and craft field since decades as a hobbyist and life long learner has given me an opportunity to learn many new things related to art, craft, paints and pottery which i am trying to share with your guys on this website. I have expertise of being professional painter and potter for the last 20+ years
I have learned mind blowing cool tips and insights which makes me a person with ability to improvise and come up with creative ideas and solutions to make stunning and impeccable art pieces of all types which are adored by people across the globe on this website and other platform.