Paint Bubbling On Wall-causes & easy fix
Painting walls will bring the most out of your living areas. It’s an incredibly creative undertaking that requires care and concentration on detail.
Nothing is more heartbreaking than spending countless hours cleaning and dusting before applying the gorgeous paints, only to be greeted with bubbles just a few minutes or months later.
If you are also affected by bubbles in the paint, don’t worry. It is a problem that happens frequently that usually occurs due to the surface. So, we’ll learn everything you need to know about why your paint bubbles are forming and the best way to resolve it.
What Are Paint Bubbling and Paint Blistering?
The phenomenon of paint bubbling, also referred to as blistering of the paint, can be a common painting issue you might come across. It occurs when a bubble or pocket of water or wet paint is formed between the wall surface and the painted surface. Bubbling and blistering could result from not having cleaned, prepped, or primed the wall correctly before painting.
These blisters or bubbles may expand and even break. Furthermore, the fluid pockets can create marks, holes or damage the home’s interior and exterior walls.

What is the cause of the paint Bubbles on the wall?
Many factors are responsible for this issue. Here are the most common causes that could affect your home.
Painting over oil-based paint
There is a chance that blisters could appear on your walls when the paint is painted over latex paint or wallpaper patches, or adhesive. In this case, we solve the issue by removing and scrubbing the paint and coating. Then, apply the putty and the new finish or coat of paint.
The painting on the surface is dusty.
Dust hinders the painting’s adhesion. When excess moisture evaporates through the interior, it pushes paint out of the way, which is not adhesive enough and expands due to dust, then forms bubbles.
To stop dust from getting on the surface, apply abrasive sandpaper cleaning to eliminate all existing dust. The area also needs to be cleaned and prepared for re-painting this situation.
Use a putty close to the water.
Putty helps to stop the swelling of water bubbles. Ultimately, it is “flashed” and disintegrates because it absorbs lots of water. The water evaporates, causing the paint to move upwards, forming bubbles.
In the majority of cases, there is a tendency for paint bubbles to appear on newly painted walls because of the humidity issue. The painting process cannot begin until the humidity issue is addressed. In some cases, plaster could require a redo.
Painting on humid surfaces
The slurry application can also cause the formation of air bubbles within humid areas, for example, when applied to a humid environment. In certain situations, bubbles can develop on a wet surface, where the atmosphere is more than 85 percent humid, or following rainfall.
The paint is applied without sanding the previous layer.
If you don’t sand and scrub the previous shiny layer, the new layer of paint will not be able to adhere as it should and could result in bubbles appearing.
Therefore it is necessary to clean it and then repaint it.
Humidity is what causes mould growth.
Every material with mould needs to be cleaned with chlorine before painting. Leave it for one hour, then rinse it with a damp, clean cloth. Before applying a new layer of paint, let it completely dry.
If you don’t address the source of humidity causing the problem, you will be prone to mould and eruptions even after a fresh coat of paint.
Painting over crumbling or lose boards
If the painting was done on boards that are crumbling or loose, the possibility of blisters is bound to form. Scraping off the plaster and covering it thoroughly using a spatula is the most effective way to resolve the issue.
Poor preparation
If the surface hasn’t been appropriately prepared and is not thoroughly cleaned and sanded, it could also cause blistering paint or peeling.
Heat
Hot temperatures (usually more than 29oC) and exposure to sunlight can result in painting bubbles.
Excess usage of putty or paint or solvent
The most effective results can be obtained when the paint applies in uniform, thin layers following the manufacturer’s instructions. This is necessary to stop bubbles from developing. if you add too much oil or water in your paint before application then also it cause unwanted small bubbles on walls.
fast painting
if you apply thin paint/excess diluted coat of paint too fast on your wall then also it may leave small bubbles and blisters on wall post drying and will make your wall look bad in light.
How Can You Fix? Five Solutions To Fix Paint Bubbling
You have a good understanding of the primary reasons for your paint bubbles. This information is useful when you are looking for a solution.
Here are five suggestions to treat paint bubbling based on the reasons mentioned.
Fix Bubbles Due to Dirty Walls
If you didn’t take your time and painted your walls with a dirty stain, Pick up your paint knife and make the necessary repairs. We suggest patching and scraping methods for the fastest fixes feasible. As the name implies, scrape off the affected areas and then patch the affected areas.
After scraping the surface, apply an ointment-soaked sponge that has been washed in soapy water to scrub the surface. Once you’ve removed all grime and dirt, use a dry rag to remove any residue.
Lastly, let the wall completely dry before applying primer and paint to the wall areas.
Fixing Bubbles Due to Moisture
The solution may appear straightforward; however, it could be quite difficult than the other. The first and most crucial step is to examine and identify the source of moisture.
For example, it could result from humidity in kitchens and bathrooms, a roof leak, or broken plumbing connections.
After identifying the root of the issue, address the issue first, and make sure the moisture doesn’t get into your walls through that point.
When you return to the paint bubbles, you must make some patches and scrape. Just scrape the areas affected and scrub them. Allow the walls to dry before patching them.
Repair Heat-Induced Paint Bubbles
Direct sunlight isn’t the sole cause of paint bubbles caused by heat. This means that electrical appliances that generate heat can also have a similar impact.
Repairs can be made with a scraper to remove damaged areas. After washing and priming the wall’s surface, ensure your home’s temperature is between 50-85 F.
However, you must read the manufacturer’s instructions for the paint package when the temperature differs from the range. This information will guide you in how to paint at certain temperatures.
Additionally, you should use indoor lighting as the primary source for painting. Close the blinds and paint. This can help reduce the temperature.
Use Boric Acid To Get Rid of Termites
There are numerous chemical solutions you can utilize to rid yourself of termites. But if you’re uneasy and require an alternative that isn’t toxic, this is the best option.
Boric acid is a solution (borax powder and water solutions) to eliminate termites. Place the solution in the spray bottle, then spray it over the affected areas.
After a few minutes, you’ll notice that the issue is solved within a few minutes.
Use a Suitable Primer
If you did not apply primer or missed it, odds are you’ve got plenty of bubbles of paint and the paint on your walls is peeling away.
You don’t need to worry. You can use the scraping-and-patching technique to fix the affected areas.
Before applying primer, remember that oil-based primers have the strongest resistance to water. This is why they are the best choice for those who paint in moist areas.
But, an epoxy primer can complete the job provided that there aren’t any external influences on painting walls.
Repair Tips and Tricks for Paint Bubbles
After you’ve found and corrected the root of your bubbling paint, it’s time to eliminate the problem completely. Place several drop cloths underneath the painting surface to catch any debris that falls. Wearing glasses and a mask, use the help of a cut-off knife to remove the bumps with a gentle horizontal or vertical scraping motion.
Once you’re done, wash the putty knife in water, then dry it with the help of a rag, and use it again to fill in any cracks or holes on the substrate by applying an even, thin layer of joint compound that sets quickly. The compound should dry over a few hours, and then lightly sand the dry compound until smooth using fine-grit sandpaper.
Alongside cleaning the area, drying, priming and beginning the painting process with the right conditions, Your method of painting will help the final product. Be sure to follow these painting guidelines to get a bubble-free final product:
Stir the paint slowly.
Use a wooden stirring device or a power drill with a paint mixing attachment to stir the paint as gently and for as short as you can. The rapid stirring over time could introduce air bubbles into the paint, which may remain in the dry paint coat.
Apply paint slowly when using a roller.
If bubbles appear in the paint coat, slow the stroke speed.
Do not apply oil-based paint directly on the latex paint.
The water and oil bases will not bind, which means the absence of adhesion between coats could cause blistering in the coats made of oil.
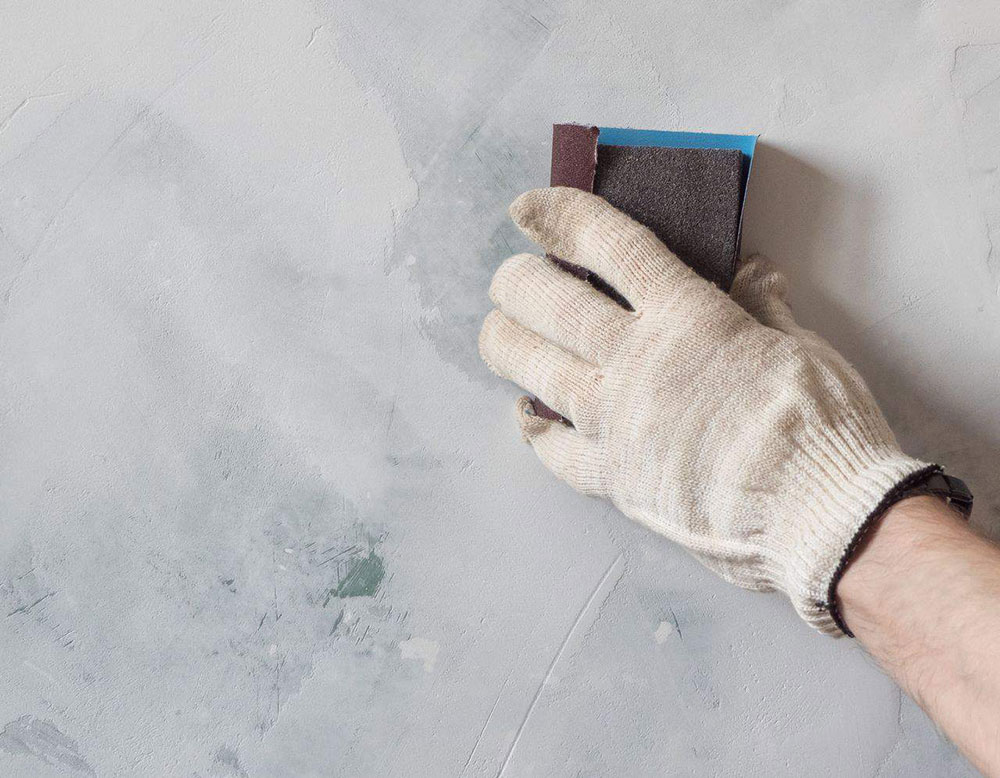
Sand the wall
Before painting and after painting if bubbles are too small then sand the wall and apply new coat if required to make it shinny, clean and smooth finish once again easily.
Frequently Asked Questions
Do bubbling paint signs mean mould?
The bubbling or cracking of your paint wall isn’t something to be ignored. It is usually a sign that you’ve experienced any flood or leakage of water in that region. The paint’s moisture presence creates small air pockets (bubbles), an ideal environment for mold growth.
Can you pop out paint bubbles?
If paint blisters appear, don’t touch them. Give the wall enough time to fully dry and set before you can address the problem with patching, scraping or sanding, then cleaning and repainting.
Is Paint Bubbling Bad?
Bubbling paint is regarded as an undesirable thing since it indicates that there is something wrong with the paint or there’s something wrong with the wall. In both cases, the best method to discover the issue is to get rid of the paint and discover it directly.
How Can One Avoid Air Bubbles When Painting?
If you’re thinking of ways to prevent air bubbles from appearing when painting, it’s easy. Air bubbles can get trapped within the paint because of their high viscosity, but they can be eliminated by gently stirring the paint with care.
Can Paint Bubbling Be Fixed?
There are a few options to solve that, though the quickest and most efficient method is using a putty knife to cut off the pieces of bubble paint. Clean the affected area, then prime and paint that area.

Being associated with art and craft field since decades as a hobbyist and life long learner has given me an opportunity to learn many new things related to art, craft, paints and pottery which i am trying to share with your guys on this website. I have expertise of being professional painter and potter for the last 20+ years
I have learned mind blowing cool tips and insights which makes me a person with ability to improvise and come up with creative ideas and solutions to make stunning and impeccable art pieces of all types which are adored by people across the globe on this website and other platform.

How to prevent watercolor paper from warping

How To Store Acrylic Paint for reuse
