How to Repair Broken Pottery
Pottery is part of the ceramics category used for daily eating and drinking. You can repair both ceramics and pottery with the same techniques. Next time you find your favorite pottery cracked or chipped, don’t throw it away! Try to fix it instead. Read this blog and understand more about fixing your broken pottery.
Can You Repair Broken Pottery?
Depending on its severity and type, there are several ways to fix broken pottery. Super glue can repair a small crack in a pottery cup. If you have a bigger crack or break, you will need epoxy or another adhesive.
Consult a professional if you are unsure how to repair your broken pottery. They can assess the damage and make recommendations.
What Is Pottery Glue Used For?
The beauty of pottery is unmatched. This material has one big downside: It’s very breakable. It doesn’t matter how careful you are or how much precaution you take. One small slip can cause a chip in your vase or fruit dish.
It can be expensive or even impossible to replace an item, whether it was a costly purchase or something you bought on vacation. Pottery glue can be used to fix this problem. The best pottery glues are so effective at repairing broken items that they look new.
The Most Common Types Of Glue Used for Repairing Pottery
Superglue, epoxy, and clear glue are the most commonly used types of glue for pottery repair. Each has its pros and cons. It’s best to know each one before you decide which one to choose.
Clear Glue or Superglue
Both Superglue and Clear glue are similar. Some potters may use these to repair ceramics, while others view them as an ineffective and cheap fix. They dry out in 10 minutes and cure within 24 hours.
Superglue is popular because it can be used quickly, but some potters don’t like that a thin film must be applied between the two pieces to ensure proper bonding. Superglue does not fill a void, as well as epoxy.
Apply a generous amount of superglue to repair the pottery. It will stick better. High temperatures can break the bond. The glue will stick for a long time. Superglue and clear adhesive can be removed in as little as 180° Fahrenheit.
This makes them unsuitable for food. Depending on the epoxy, they can fail between 200 and 400 degrees Fahrenheit.
Superglues are useful for ceramics, especially if you don’t plan to handle them much. This works great for lightweight ceramics. Superglues can be washed up to twice and are usually water-resistant.
Pros
- Dries fast
- Choose items that require little handling
- The majority of them are resistant to water
- Epoxy is cheaper than other alternatives
- Offers you a quick fix
Cons
- Not as strong and durable as epoxy
- It could fall apart if you don’t use enough pressure to bond the objects together.

Epoxy Glue
Superglue is a great quick fix but not a permanent solution. Epoxy is a great gap filler and works well with ceramics. Epoxy fills the gaps and forms a strong bond between the broken pieces. You may pay more, but the solution will last.
You will need to wait several days before the epoxy is fully cured. You can use the epoxy after 12 hours but not for heavy use.
Avoid clamping epoxy too tightly, as it may squeeze out the gaps between the ceramic. Epoxies that are stronger can cover up the imperfections in the ceramic.
The repair lines are easier to hide with stronger epoxies. It takes more work to use epoxy to fix a damaged surface, but it is more durable than super glue.
Pros
- Fills in the gaps
- Repairs are more durable than superglue
- Quality pieces are more expensive
- Repair lines can be hidden better
- Superglue is not the only solution that can be used.
- Superglue is more durable.
Cons
- Setup takes longer
- Some epoxy emits strong toxic fumes
- More effort required
- Resin can be yellow due to UV rays
Both work for small cracks but not larger ones. Super Glue works well for fixing chips and nicks on clay pots. However, epoxy is best for larger repairs, such as broken handles or shattered pottery pieces.
How to fix broken ceramic art?
Don’t worry if your pottery breaks! You can repair it with a bit of effort and time. It will look as good as it did when you first bought it. What you need to do is:
- Collect your materials. You will need super glue (or cyanoacrylate), a toothpick, and a small piece of sandpaper.
- The edges of the pottery should be cleaned. The glue will adhere better if you clean the edges of the pottery.
- Use the toothpick to spread it evenly. Spread it out evenly with the toothpick.
- Hold the pieces in place until the glue has set.
- Sand any rough edges with the sandpaper. That’s all!
Now that your pottery has been repaired, you can enjoy it.
How can you repair broken pottery using the art of Kintsugi?
Using the Japanese kintsugi technique, you can recycle broken pottery to create a unique item even more beautiful than its original.
Kintsugi, also known as ‘golden joinery or gold repair’, is an ancient method for repairing broken ceramics with lacquer and a little bit of gold.
Step 1: Gather all your supplies
You’ll also need the following five items:
Sandpaper: You can remove sharp edges from your broken objects.
Glue: You will have more time to complete your project using a slow-drying adhesive. Ensure the glue is food-safe if you plan to use it for eating or drinking. You can use ceramic adhesive or clear epoxy resin if you only want to decorate the item. Ask at your local art supply store.
Gold Powder: Gold mica powder is available in art supply stores.
Icy Pole Sticks: Use these to apply glue.
A thin disposable brush: To apply the gold powder.
Step 2: Sand
Sandpaper can be used to sand the edges of your broken pottery lightly.
Step 3: Apply the glue
Apply glue using the icy stick to the edges of the ceramic item. Push the pieces of pottery back together.
There will be some glue leaking from the cracks. This glue will be useful in the next step.
Step 4: Applying the gold powder
The gold powder will adhere to any excess glue in the cracks.
You will need to be quick when you apply the powder. However, using slow-drying adhesive can give you some extra time.
Kintsugi embraces the imperfect or flawed.
Step 5: Wash, then wait
After 30 minutes, wash the item thoroughly to remove any excess gold.
Step 6: Admire your handiwork
Once you have washed the item, that’s all, you can now enjoy!
Use your kintsugi to display jewelry, other accessories or as a planter. You can also use it in the kitchen (if you use food-safe glue).

How do you fix a broken ceramic cooking pot?
When they break, ceramic pots can be a source of frustration. They usually break just when you need them. Many people don’t know how to repair broken pots.
Steps To Fix a Broken Ceramic Cooking Pot
You should start the process once you have all the necessary materials. Before you begin, you need to sort out a few things. This must be done first.
Using gravity, you can use PVC pebbles or rice to align the pieces of broken cookware. You can quickly get sand or rice in a container.
You must dry-match the pieces before applying adhesive. This can be done by placing the most significant part of your cookware into the rice container. Gravity will hold it there. Before adding epoxy, make sure they are the same size.
Step 1:
You can begin the process once you’ve verified that all the pieces are in the right place. You should first clean any broken pieces with denatured liquor. If you cannot find denatured liquor, you can use methylated spirits.
Step 2:
Now, get your 2-part 5-minute adhesive. Put equal amounts on the paper pads that you’ve sourced. A cardboard pad can be used in place of a paper pad.
Mix the epoxy with the wooden stick or pin tool. Make sure both parts are distributed evenly. Use a wooden or pin tool to apply adhesive to one side of the broken part.
Step 3:
Next, you need to place the ceramic pieces permanently. Set the pieces carefully so they don’t end up in the wrong spot.
Align each piece one by one and then squeeze them together. There will be a small amount of adhesive that oozes out from the gap. To avoid smearing, it is best not to wipe the adhesive off. Hold the ceramic piece in place for 15 minutes, then move on to the next one.
Step 4:
Repeat the process on other pieces. It takes time but is well worth it. Please confirm the details will remain in place during the curing period. The cure involves adding heat (around 75 degrees Fahrenheit) during the period.
Step 5:
It’s not necessary to add the clay at this point. Use clay to provide additional support when gravity and glue don’t hold the pieces together. The clay can be used as a cement to keep the pieces together.
Step 6:
You will now cure the epoxy in an oven. You can continue the process once you have verified that the fixed ceramic will remain in place during the curing. Let the epoxy cure for at least 60 minutes before moving on to the next step.
Step 7:
Next, remove any excess epoxy. This step should only be performed after the curing procedure. Scrape off excess epoxy with a razor blade. This shouldn’t be too time-consuming.
How to fix broken pottery pieces at home?
You can glue your ceramic piece back together if it is small enough to fit into a pot. Apply the adhesive on one of the surfaces. Hold the surfaces in place while the adhesive dries.
If the ceramic fragment is too big to fit into a pot, you can use epoxy resin. Cleanse the ceramic surfaces that will be glued. Mix the epoxy resin as per the instructions of the manufacturer.
Join the two surfaces by applying the resin on one side. Hold the surfaces in place while the resin dries. You can tape the ceramic if you don’t wish to glue it back together.
The ceramic surfaces that will be taped should be cleaned. Apply a strong strip of tape to the ceramic surface. Tape the surfaces together.
Can you fix ceramics with milk?
You can’t afford to replace a dish each time it breaks, and using glue or other chemicals to repair your dishes is bad for your health. You can fix your dishes with the tools you have at home and without using harsh chemicals found in glues.
Casein is a casein-containing protein that can be transformed into natural plastic with heat. If you have cracked a beautiful plate or dish, you can use this trick to fix it.
You may be lucky if you have a broken ceramic piece and want to repair it. Milk can be used to repair broken ceramics. Try this method the next time your mug or plate breaks.
You’ll need the following:
- A bowl of milk
- A broken piece of ceramic
- A toothpick
Instructions:
- Put the ceramic fragment in the milk bowl.
- Apply milk with a toothpick along the edge of the crack.
- Hold the ceramic pieces together for a couple of minutes so the milk can dry and bond.
- After the milk has dried, you can repair your ceramic item!
What is the best glue for clay pottery?
The best clay glue is a strong, flexible adhesive that holds pieces together securely. It is essential to carefully read labels to select the best adhesive for your project. These adhesives may be best suited to your project. Ask a craft store salesperson if you’re unsure which adhesive to choose.
Polymer clay requires glue to be used for sealing the pieces. Some glues can cure polymer clay completely or degrade it and make it sticky. It is best to use a mechanical bond to attach polymer clay to metal rather than an adhesive. With an adhesive, it can be hard to adhere baked polymer to metal. Metal that adheres to a bond can peel off after a few months. The metal must be attached to the clay in the safest way possible. This is the glue most commonly used for polymer clay.
Foam can be applied using the clear gel-like adhesive you squeeze from a tube. Replace the tube if you notice rubbery or gummy candies coming from it. E6000’s bond will be affected if it is not baked. This glue works well for pinpointing jewelry made of thread knots and beads and adheres to tiny metal pieces. It has the consistency of honey and dries clear in 2-4 hrs. It has a mild, fresh scent and is non-toxic. PVA adhesive, on the other hand, is white glue. Elmer’s Glue-All is a simple but not very strong glue.
PVA adhesives cost more than non-toxic alternatives such as Weldbond. This glue is used to seal paper forms and boxes coated with polymer clay. PVA glue is NOT required to apply clay to glass. You can create various materials that are all based on polymer and can be used as glue to join two pieces. It’s similar to polymer but without fillers, binders, or pigments. Bake and Bond of Sculpey Sculpey look similar to Translucent Liquid Sculpey but are thicker and opaque. These mediums and paints are very similar to polymer clay and can also be heat-set.
You can expect a weak connection if you glue metal onto polymer clay. It is best to create a physical bond that holds the polymer clay. This technique can be used to make various accessories, including barrettes and pin backs for earrings, bails for glue-ons, or polymer settings for stone or glass gems. Add clay on the bail to create a place to stamp or carve decorative cane slices.
The best way to repair a broken ceramic item is by gluing it together. Loctite super glue liquid precision has the highest versatility and is best for ceramic repair. This super glue is strong, transparent, and will last a long while.
How to remove a broken line in your pottery?
After your piece is cured, we will remove all visible chips, cracks, and break lines.
We will discuss non-porous materials such as stoneware, glass, resin, and porcelain. You will need Epoxy to do this process if you use porous materials.
Use a solution of 91% alcohol to remove the dust. Fill in the cracks or missing pieces with a thin layer of filler. Wait 24 hours for the filler to cure.
After the glue has cured, use a Rotating Tool and Sanding Disk to sand down the brake lines. When doing this, wear Safety Eyewear.
To avoid burning, use low speeds with the sander. Hand sanding is also an option. You can also hand sand it.
When you’re finished, check the piece for any cracks. Continue sanding if you see any cracks. To prepare your piece for painting over breaks, clean it again with 91% alcohol.
Repairing A Porcelain Mug
Apply a small amount of dishwashing soap and water to the porcelain mug to repair it. Make sure that your mug has dried completely before you start. The handle and the mug should be coated after applying the adhesive. Be sure to align and press the pieces properly before gluing them together.
If you must remove the glued-on mug, use a dry, clean cloth. Apply pressure when removing the mug from the adhesive to avoid damaging it. Reapply adhesive to the damaged area and then attach the mug firmly to the surface.

Conclusion
Don’t be discouraged if your pottery breaks! Depending on the severity, there are several ways to repair it. Super glue or epoxy can be used to fix small cracks.
Wire or mesh can be used to hold larger pieces together. You can glue the pieces back together if they are entirely broken, but you may want to replace them with new ones if it is completely shattered.
Frequently Asked Questions
Can broken chipped pottery be repaired?
You can fix the chips on your ceramics by using two-part Epoxy. Epoxy acts like putty and fills in the gaps between your ceramics. The epoxy resin will have a different drying time depending on your use. However, it can take several days for the Epoxy to cure.
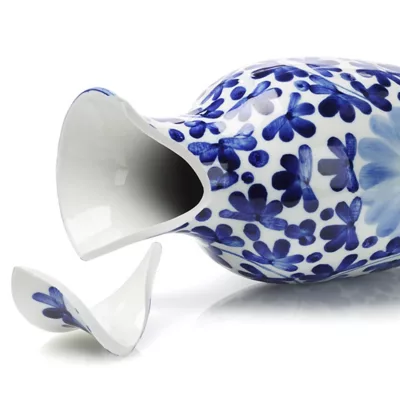
How to fix a cracked ceramic vase?
The two-part clear Epoxy is the best choice for repairing a broken vase. Apply the glue to the edges of each broken piece. If you need a perfect fit, avoid using epoxies that dry quickly. Use the correct acrylic paint for the vase repairs. It takes some time to find the perfect paint for your ceramic vase.
How can I repair my pottery?
Start by performing a dry fitting to fix your pottery. You can see how to combine the pottery after using epoxy. You will mix the two parts of epoxy on a paper pad once you have it. The next step is to apply it around the edges of the pottery that are broken. To avoid excess epoxy, you only need to apply it on one broken edge.
How to avoid cracking your ceramic objects?
Ceramic objects are used in many different settings. Their mechanical and physical properties are often displayed, but the fragile nature of these ceramics is often forgotten. Modern adhesives and techniques can help restore ceramic objects after they are damaged. Simple steps can be taken to avoid cracking.
What technique is used to repair ceramics using gold?
Kintsugi is also known as Kintsukuroi, which means golden (“kin”) repair (“tsugi”). It is a process that repairs ceramics with gold and lacquer.

Being associated with art and craft field since decades as a hobbyist and life long learner has given me an opportunity to learn many new things related to art, craft, paints and pottery which i am trying to share with your guys on this website. I have expertise of being professional painter and potter for the last 20+ years
I have learned mind blowing cool tips and insights which makes me a person with ability to improvise and come up with creative ideas and solutions to make stunning and impeccable art pieces of all types which are adored by people across the globe on this website and other platform.


