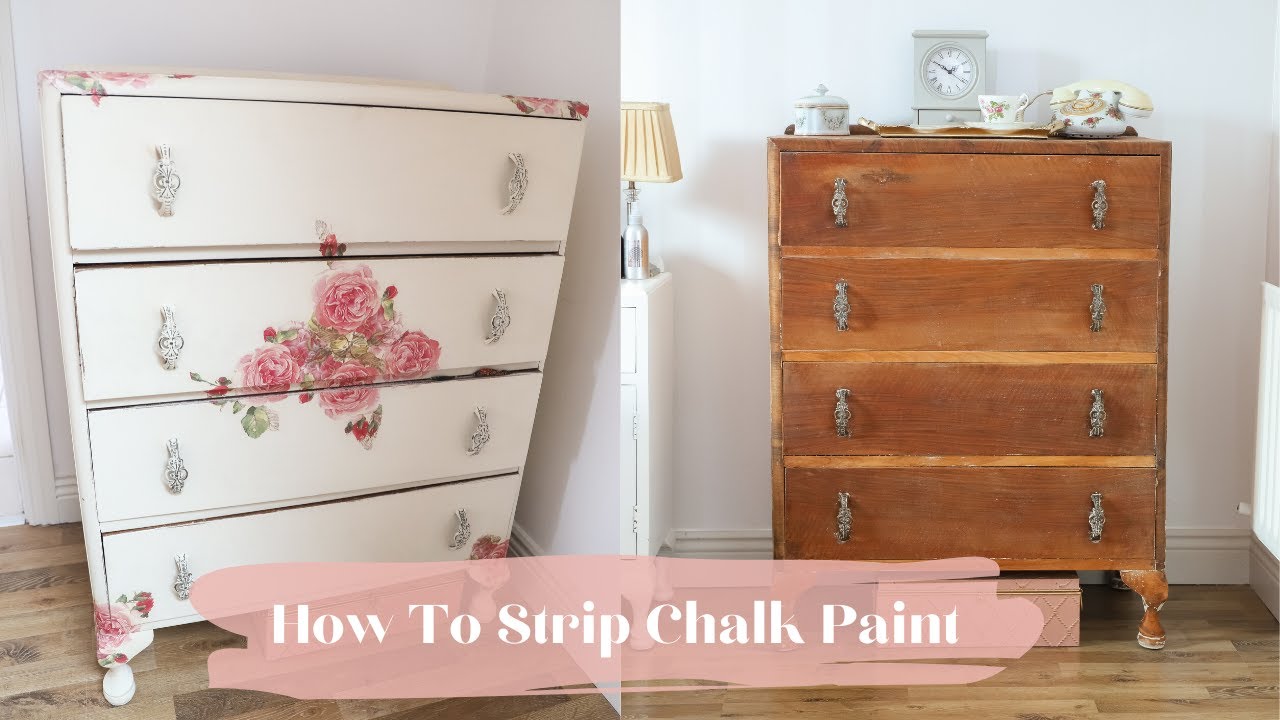
How to remove chalk paint with simple methods
Chalk paint was a huge hit last year. Do-it-yourselfers were using it on everything. Suppose you buy furniture with a chalk paint finish that you don’t like. What if you can’t get chalk paint off?
Chalk paint’s popularity can be attributed to several things. Priming, sanding, and cleaning are usually all that are needed. It also offers a lovely matte finish, is easy to work with, and dries swiftly after application.
Not everyone can benefit from it. It’s okay if you don’t; you can go back and remove it. In this post, we’ll show you how!
Chalk Paint Removal from Wood: A Step-by-Step Guide
Gather Your Materials
To begin removing chalk paint from wood furniture, make a toolkit for yourself. Why? To prevent rushing out of the house, you might make sure you have everything you need at hand before starting a project.
The following is a quick tutorial for removing chalk paint from wood surfaces:
- Gloves
- white mineral alcohol
- Hose
- Respirator Protective lenses
- Sponges
- lint-free supplies
- Steel wool
- Sandpaper
- a container of water
You need heat and sunlight to dry the water quickly, so apply it. Wood and water do not always mix if the water is allowed to sit. A lovely day, on the other hand, reduces this risk.
Remove the Wax
Before beginning any project, wear gloves, a respirator, and eye and face protection. White mineral spirits can be toxic, so be careful while using them.
Wax is used to protect most chalk-painted furniture. Preserving the wood’s surface by waxing it before painting it with chalk is common.
Make a slit in the wax to expose the chalk paint underneath. Use mineral spirits to massage the area and a lint-free cloth for best results. Reapply white mineral spirits in a circular motion if the fabric becomes too dry.
Spray water on the item frequently while you’re working to keep it clean. The paint will peel in numerous places if you keep rubbing it.
Grab a Sponge and Scrub
Lacquers and other paint treatments last far longer than chalk paint. This means that you should have no problem removing the paint in its entirety.
Begin by saturating a sponge in white mineral spirits. Start by scrubbing a small section of the painted surface. Press down on the sponge, but don’t scratch it. Make use of the mineral spirits to help with some of the work.
Use water to clean a component after washing it thoroughly. The roughness of the surface will be maintained if you wipe your sponge after each region to avoid paint accumulation. Afterwards, use your wits to navigate the furniture. With a bit of elbow work, most paint can be removed. However, the entire course of treatment often passes much faster than expected.
Use Steel Wool for Stubborn Spots
After the remainder of the paint has been removed, you’ll find some spots where the chalk paint has pierced the grain. It can stick even to the rougher surface of a sponge. Instead of using sandpaper, try using steel wool. Again, a steady but not excessive amount of pressure should be used, but not to the point of gouging.
Gentle and cautious movement with low pressure should be used when you’re in doubt. Even if more passes are required, the wood can be salvaged. Steel wool is typically used to remove any remaining paint. However, if this does not occur, there is no need to be alarmed. There is still a lot of work to be done. Please, take as much as you like.
Rinse and Let Dry
After the tough stains have been removed, it’s time to do some cleaning. Using clean water, remove any residual paint from the surface. After that, dry the area using a lint-free cloth. Any apparent defects should be closely examined.
Finally, place the artwork in an area that is both warm and sunny. Climate, the item’s shape, and relative humidity all impact how long it will last. If the task is completed that day, the component must be checked once per hour. If not, let it air dry until after sunset. Overnight interior storage in a garage or shed or on a porch or patio protected from the elements is the best bet for covering outdoor furniture.
Sand Away Stains
The use of sandpaper is recommended if any paint spots remain. It’s entirely up to you whether you like to use a hand sander or do the whole thing by hand. The aim of the early stages is to provide constant, non-aggressive pressure. A small amount of wood is removed during the sanding process.
Because of this, you must exercise caution to avoid causing any harm to your equipment. Sandpaper with a grit of 240 is generally sufficient. Sand that has been deposited in a direction perpendicular to the grain. After removing all paint from the significant areas, sand the surface to a smooth finish.
Grab an Engraving Tool to Get Hard-to-Reach Paint
Paint might become trapped in the gaps of your wooden furniture if it has detailed patterns, layered trim, or other little characteristics. Fortunately, a sanding head and an engraving tool may be used to access these surface portions (like a Dremel).
This is another period that requires utmost caution. Inexperience with engraving tools might lead to an overestimation of their capabilities. Begin by setting the sanding head and sanding on a gap that will be difficult to detect after the object is finished. You’ll get a better idea of how to apply pressure and how soon to move from this.
Using the sanding head, go around the object to remove any paint residue. Consider the design’s intricacy while making plans.
Sand the Entire Surface
Examine the complete object after removing all of the paint. You’ll be able to have a better look at the surface and find a missing piece of the puzzle this way. The surface is also prepped for refinishing. Once you’ve finished, you may use any typical wood finishing method.
Clean the Surface
After sanding, it is essential to clean the surface thoroughly. Wipe it down with white mineral spirit and a dry, clean towel. You’re done when the item has completely dried. As a result, you are free to complete it in whatever manner you see proper.
A Quick Guide to Removing Chalk Paint from Glass
A mirror, picture frame, or table insert may be easily removed from a piece of glass with chalk paint. One tool and some labour are all that is needed.
I’m talking about a different kind of razor here. As an alternative, you might use a straight razor. Even if it’s feasible, it wouldn’t be wise to use the blade with the unhoned side facing you. If you choose a razor scraper, you will obtain a fashionable handle. It will be easier for you to keep hold of and much more enjoyable to work with.
Hold the razor scraper blade at a 45-degree angle to the glass surface. Drive the blade into the paint with a steady stream of power.
Drips, edges, and spots may form if the mirror or glass is not removed prior to applying chalk paint to a frame or piece of furniture. This is a great way to get rid of these kinds of problems. On the other hand, using a razor blade scraper to fully clean a surface may take decades. In this circumstance, you might invest in a massive wall scraper.
once the paint is removed then you can paint your glass items and glass windows once gain to make them look stunning.
How to Get Chalk Paint Out of a Carpet
Errant drips are always a possibility while painting. You might be inclined to panic if some chalk paint falls on your carpet. Chalk paint may be easily cleaned from carpet just like oil paints. Water-based formula makes the process easier. All you’ll need is the correct equipment, cleaning supplies, and a little bit of know-how.
There are detailed instructions on how to do this while the paint is still wet:
- Constantly exhaling
- Create a solution by combining dish soap and warm water.
- Continue wiping from the outside in.
- Moisture may be removed by using paper towels.
- Allow the stain to dry once it has been removed.
A step-by-step tutorial for removing chalk paint from the carpet is provided here.
Gather Materials
Before attempting to remove chalk paint from the carpet, gather a few items. These items are needed to remove chalk paint from the carpet:
- Gloves
- suitable attire (several)
- it uses steam (optional: for dry stains only)
- a mild liquid dishwashing detergent
- Warm water and hand towels in a dish

Dry Chalk Paint Stains Preparation
You may still be able to remove a chalk paint stain from your carpet even after it has dried. Because it contains water, chalk paint may be rehydrated. The easiest technique is often utilising a portable steamer. Rehydrating and softening the paint with steam may make removal simpler. You can keep an eye on your work and prevent the carpet from becoming wet again, which will bring the stain back.
If you have a steam-capable garment iron, try sandwiching a towel or other cloth between the stain and the iron. Because steam can easily pass through the towel, it can be easily ironed. To avoid any risk of paint leaking out of the towel, you should avoid letting the iron come into close contact with the paint.
As a result, you risk smearing the paint while drying since you cannot see what you are doing. Because of the iron’s weight makes pressing paint into carpet fibres a breeze. Because of this, the response isn’t the most ideal.
Then, when you’ve decided on a method, use steam to rehydrate and soften the paint. After the paint has been prepared, the second process follows.
Remove Excess Paint by Blotting
Scraping off as much extra paint as you can is the first step. To prevent spreading the chalk paint or pushing it deeply into the fibres:
- Blot rather than rub.
- Starting at the outer border, blot the stain toward the centre.
- Throw away the paper towels and start again if they get too saturated with paint.
Make a warm soap and water mixture.
After removing any remaining paint, run a sink full of warm water and a few drops of liquid dish detergent. Take a piece of fabric and swish it around a bit.
Apply Soap and Water Mixture
A corner of a slightly gathered fabric should be dipped in the soap mixture. You want it moist, not dry, so don’t wring it out.
Continue Blotting
Continue washing the area with a soapy cloth corner. Begin on the outside and work your way in. If the soap mixture starts to dry out, re-soak a piece of cloth in it. If the fabric has paint on it, find another piece or buy a new one. Keep an eye on your soap mixture, too. The paint will gradually stream into the basin as you continue to dip. If water accumulates, drain it and start again with a new batch of soap mixture.
Take Paper Towels and Soak Up Extra Water
The carpet will become a damper as you work. As soon as it starts to gather, grab some fresh paper towels and blot. They will take up some paint and moisture, helping with cleaning and drying off the area.
Let Carpet Air Dry
After the last blotting, let the carpet dry naturally. Most of the time, this should take a few hours.
Conclusion
Ultimately, chalk paint may be taken off many different materials and surfaces. The majority of instances may be handled by the techniques above, making it quite simple to remove chalk paint. if you are interested in removing paint from laminates just like chalk paint then check out our post about it here.
FAQ
-
How Can Chalk Paint Be Removed Without Sanding?
Chalk paint may be removed with the help of heat guns, paint solvents, and paint strippers. The standard paint should be treated with paint remover and paint solvents brushed on paint, allowed to sit for 30 minutes, and then scraped off with a putty knife. When the paint has gotten soft, scrape it off. Finish by cleaning the paint with steel wool and soapy water.

-
Does chalk paint clean up easily?
Yes, chalk paint may be removed with a scrub sponge and soapy water. Before removing the paint with a sponge, dampen it with water. With a moist towel, remove any remaining paint traces from the wood.
-
Is it simple to remove chalk paint?
Chalk paint with a wax coating cannot be painted directly over and is more difficult to remove than other paint forms. Conversely, unwaxed chalk paint does not require removal and may be painted over without priming.

Being associated with art and craft field since decades as a hobbyist and life long learner has given me an opportunity to learn many new things related to art, craft, paints and pottery which i am trying to share with your guys on this website. I have expertise of being professional painter and potter for the last 20+ years
I have learned mind blowing cool tips and insights which makes me a person with ability to improvise and come up with creative ideas and solutions to make stunning and impeccable art pieces of all types which are adored by people across the globe on this website and other platform.

Can you bake acrylic paint on wood

Can You Use Acrylic Paint to Dye Hair